Button
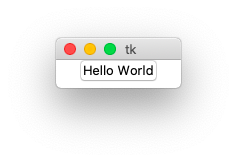
Let’s start with a simple example of creating a button which displays some text.
A one-button program
First we import the tkinter module and give it the shorter name tk:
import tkinter as tk
Then we create a Tk root object which represents the window
and will be the parent for all the other widgets:
root = tk.Tk()
Then we create a button object which has root as parent,
and to which we give the text Hello world.
This object calls the method pack()
which makes the button visible in the window.
Finally root calls the mainloop() method to start the program:
tk.Button(root, text="Hello World").pack()
root.mainloop()
"""Create a simple button."""
import tkinter as tk

root = tk.Tk()
tk.Button(root, text="Hello World").pack()
root.mainloop()
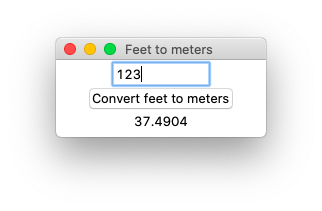
Convert feet to meters
Now let’s create a real application which does something useful. The following program has an input entry field, a button and an output label. When you press the button (or hit the return key) it converts feet to meters.
After importing the classic Tk module as tk
we create the root object and set a descriptive window title:
import tkinter as tk

root = tk.Tk()
root.title("Feet to meters")
Two of the widgets, the entry widget and the label widget,
have special StringVar variables:
feet = tk.StringVar()
meters = tk.StringVar()
Now it’s time to create the three widgets:
- an entry widget with the text variable
feet - a button widget with the command function
calculate - a label widget with the text variable
meters
All three widgets are placed with the pack() method:
tk.Entry(root, width=10, textvariable=feet).pack()
tk.Button(root, text='Convert feet to meters', command=calculate).pack()
tk.Label(root, textvariable=meters).pack()
Finally we bind the calculate function also to the Return key
and start the main loop:
root.bind('<Return>', calculate)
root.mainloop()
The conversion is done by calling the calculate function which gets the feet value
from the StringVar feet,
converts the value to meters and sets the StringVar meters.
We enclose the calculation inside a try-except statement to account for value errors,
in case the input string is not numeric.
def calculate(*args):
    try:
        value = float(feet.get())
        meters.set(0.3048 * value)
    except ValueError:
        pass
import tkinter as tk

root = tk.Tk()
root.title("Feet to meters")

feet = tk.StringVar()
meters = tk.StringVar()

def calculate(*args):
    try:
        value = float(feet.get())
        meters.set(0.3048 * value)
    except ValueError:
        pass

tk.Entry(root, width=10, textvariable=feet).pack()
tk.Button(root, text='Convert feet to meters', command=calculate).pack()
tk.Label(root, textvariable=meters).pack()

root.bind('<Return>', calculate)
root.mainloop()
Concepts
To understand Tk you need to understand:
- widgets
- geometry management
- events
Widgets are the things you can see on the screen, for example a label, an entry field or a button. Later you will see checkboxes, radiobuttons, and listboxes. Widgets are sometimes referred to as controls.
Widgets are objects, instances of classes. In the example above we had the following 2-level hierarchy:
- root (Tk)
- entry (Entry class)
- button (Button class)
- label (Label class)
When you create a widget, you must pass its parent as the first argument. Whether you save the object under a variable is up to you. It depends if you need to refer to it later on. Because it is inserted into the widget hierarchy, it won’t be garbage collected.
Just creating the widget does not yet display it in the window. You need to make a call to a geometry manager.
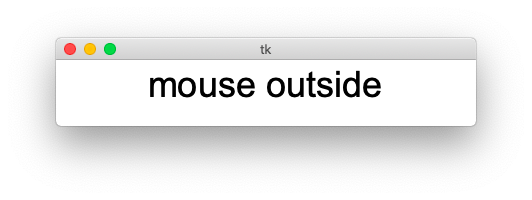
Event bindings
Each widget in Tk can have event bindings. In the following example we bind a function to these events:
- enter the widget
- leave the widget
- click the mouse button
Tk expects an event callback function which has an event object
as its first argument. Here we define a lambda function
with an event argument e, but we do not use it here.
Event handlers can be set up for:
- the individual widget
- a class of widgets
- the toplevel window
import tkinter as tk

root = tk.Tk()
label = tk.Label(root, text='starting...', font='Arial 36')
label.pack()

label.bind('<Enter>', lambda e: l.configure(text='mouse inside'))
label.bind('<Leave>', lambda e: l.configure(text='mouse outside'))
label.bind('<1>', lambda e: l.configure(text='mouse click'))

root.mainloop()
Frame
The frame widget displays just a rectangle. It primarily is used as a container for other widgets. A frame has these common options:
- padding - extra space inside the frame
- borderwidth
- relief (flat, raised, sunken, solid, ridge, grove)
- width
- height
The example below shows the 6 different relief types and uses a borderwidth of 5.

import tkinter as tk

root = tk.Tk()

for x in ('flat', 'raised', 'sunken', 'solid', 'ridge', 'groove'):
    frame = tk.Frame(root, relief=x, borderwidth=5)
    frame.pack(side='left')
    tk.Label(frame, text=x).pack()

root.mainloop()
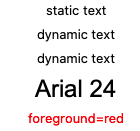
Label
The label widget displays a static text, for example the text next to an entry. User do normally not interact with a label.
Common options are:
text- a static texttextvariable- a dynamic text from a variableimage- an image to be displayedcompound- center, top, bottom, left, right (text position in in relation to image)justifiy- left, center, rightwraplength- linelength for long labels
The following example shows a label with a static text
and another with a dynamic text.
If both are defined, the dynamic text will have precedence.
The font keyword takes a string with the font family and font size.
The foreground keyword takes a color string.
import tkinter as tk

root = tk.Tk()
str = tk.StringVar(value='dynamic text')

tk.Label(root, text='static text').pack()
tk.Label(root, textvariable=str).pack()
tk.Label(root, text='both', textvariable=str).pack()
tk.Label(root, text='Arial 24', font='Arial 24').pack()
tk.Label(root, text='foreground=red', foreground='red').pack()

root.mainloop()
Labels also accept the relief keyword.
import tkinter as tk

root = tk.Tk()

for x in ('flat', 'raised', 'sunken', 'solid', 'ridge', 'groove'):
    tk.Label(root, text=x, relief=x, borderwidth=5).pack(side='left')

root.mainloop()
Button
Buttons have a command keyword which allows to specify a function.
This function is called, but without an argument.
We can use the lambda function to create a function on the fly and
provide an argument.
import tkinter as tk
root = tk.Tk()

def callback(x):
    print('button', x)

tk.Button(text='Button 1', command=lambda : callback(1)).pack()
tk.Button(text='Button 2', command=lambda : callback(2)).pack()
tk.Button(text='Button 3', command=lambda : callback(3)).pack()

root.mainloop()
Pressing the 3 buttons one after another writes this to the console:
button 1
button 2
button 3